0


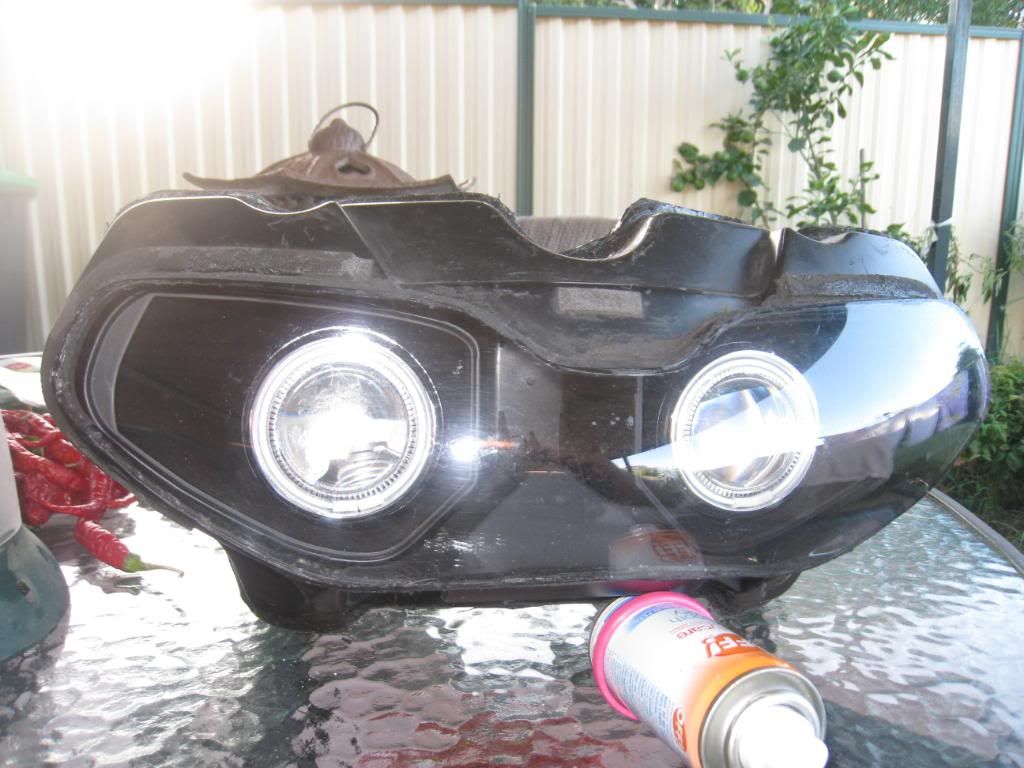
Anyone ever open one up? Yesterday I noticed the reflector or ? (the piece that cups the tip of the halogen bulb) was at an angle. The reflector is supported by 3 plastic tabs, one is broken and gone, and it's now resting on the tip of the H7 bulb. The lower is the projector with an H9 in it.
I looked at the fiche at ronayers.com and the assembly appears to be sealed. I can't order new internal parts, like that reflector or whatever its called. Not wanting to drop $292 on a new assembly, nor $150+ on ebay...has anyone opened one of these up? I'm about convinced I'd destroy the thing, but it appears to be the cheaper alternative.
I assume they are Ultrasonic welds and have seen people split them to tint...but??? Damm that does suck. My bud adj his on the 05 and scuffed it up inside. Try a search on GSXR or gixxer.com poss come up with some stuff. Maybee a hot nife and Reseal it after..
LRRS EX 66
BostonMoto | Yoshimura | GoPro | K/N | Amsoil | Computrack | Vortex Sprockets |
EBC | Dunlop | Woodcraft | ArmourBodies | Fuel Clothing | Progrip | FmF Racing|
factoryeffex
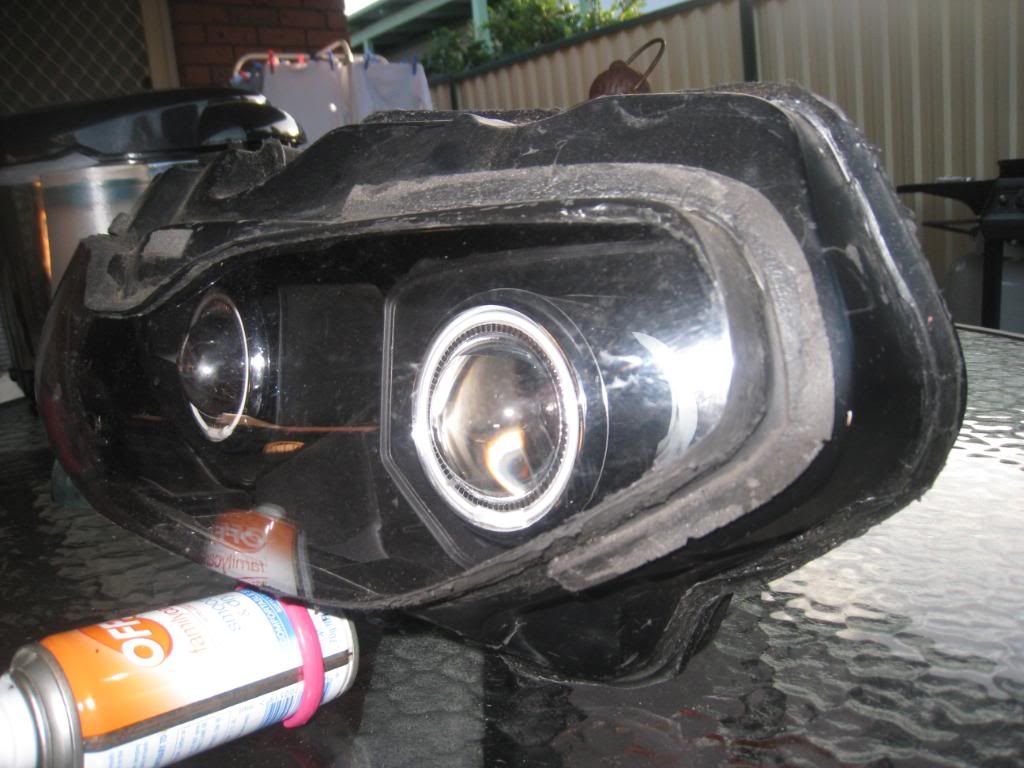
take it off the bike, toss it in the oven at 200 degrees for about 10-15 minutes and it comes apart pretty easily. make sure you pick up some new sealant to seal it back up again. I did it for my projector install.
http://www.fz6-forum.com/forum/fz6-m...oth-sides.html
on oven. Did it to open my old A4 headlights, can't be too much different.
Originally Posted by reiobard

Damm Nice Work...I woulda just tossed it...

LRRS EX 66
BostonMoto | Yoshimura | GoPro | K/N | Amsoil | Computrack | Vortex Sprockets |
EBC | Dunlop | Woodcraft | ArmourBodies | Fuel Clothing | Progrip | FmF Racing|
factoryeffex
put it on a wet towel in the oven.
There are 2 different types of seals I've seen and they require very different amounts of heat. The way I do it is to cycle between 5-6 minutes of heat followed by 1-2 minutes of attempting to separate. After a couple cycles you'll start to get some split. Don't force it, continue to cycle and work it apart.
200*F for the "separateable" halves of the housing; usually for the softer black plastic attached to the front lens/bezel assembly. The adhesive here will be like a black silly putty once at 200*F.
340*F-350*F for plastic weld (?); attaches the clear plastic lens another hard plastic part (like a chrome middle piece/bezel). This adhesive doesn't really soften; the bond just can be broken. These parts were probably never intended to be separated, but can be done w/ patience.
Not all head light assemblies have the 3rd middle piece; usually 2 halves. Also there are often a few small screws or tabs which need to be released.
i'm planning to possibly do this to install projectors as well.
did you have any issues with moisture getting in after? or is it still good as new afterwards?
Once you get it open you can fixthw broken piece with some two part clear epoxy. They have it at lowes and home depot. Make sure to get the quickest bonding time if you go this route. Stiff will harden in under a minute from when you mix it.
So far so good.... have been running them for about a month and no issues yet, and i have no garage, so the bike lives outside in the rain and cold during the summers.
Thanks for the info. Looks as if the oven is the way to go. I did search around a bit but the info I found was for an older gixxer 1100 with actual glass...pretty sure mine is plastic, all plastic. Is the rest of the thing going to hold up to 200 degrees or will it get soft, warp etc?
It will obviously be out of the oven to halve it and fix it, how do I glue it back together, 200 degrees again and go or should I get more of that adhesive...and does anyone know what adhesive I should get, in addition to the clear stuff to actually fix the reflector ?
200*F will not cause any damage. But 350* can cause some types of plastic to start to become become soft.
I scrape the black goo out immediately after separating the headlight; requires a few cycles into the oven to keep the stuff soft as you get it all out. Then use a 2-part epoxy plastic weld to reseal. I've had fine results w/ the stuff available at HD or Lowes in a dual-tube plunger. Get the one w/ a medium set time (5min?) if not longer...definitely don't get the <1 minute epoxy. I put the epoxy in a syringe after mixing it up and it makes it easier to apply.
If you want to go nuts, try this sort of stuff available at paint/body shops.
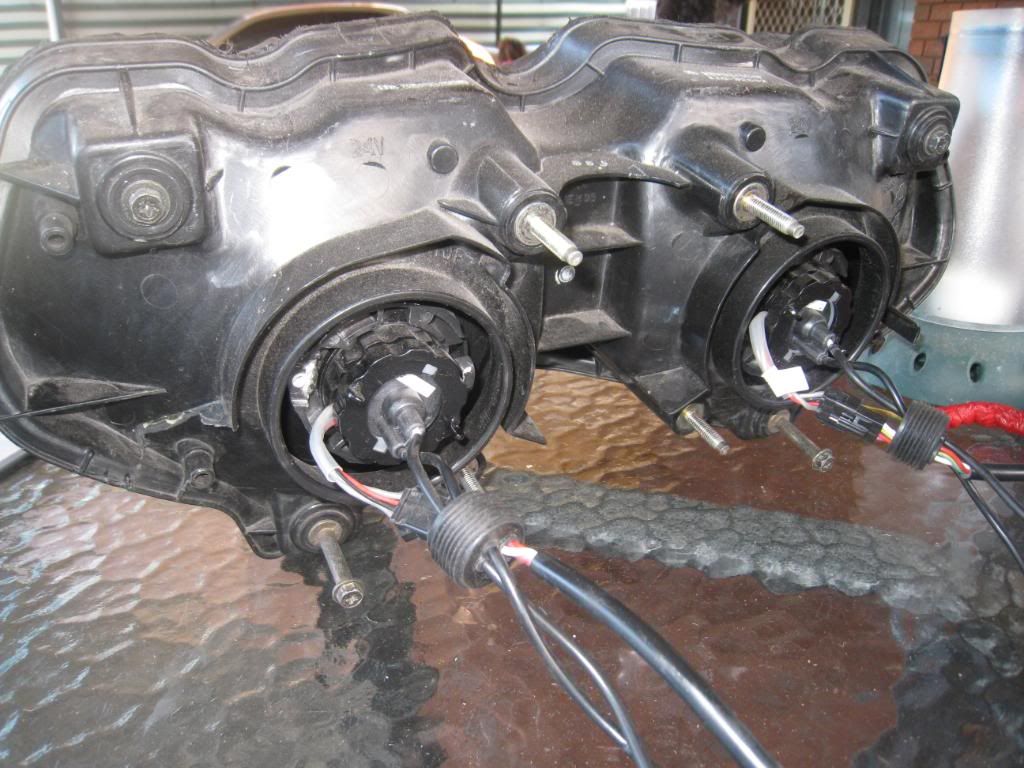
So last night I was wondering if I could possibly fix it without opening it, when the tab / plastic support piece broke it left a hole about the size of a dime in the rear of the housing. Might be onto something here. but I really need to get the assembly out first, and pray it pans out.
I'll use the oven as the last resort.
That IS some nice work!!
This will be going in my TL in a coupla weeks.
Jake
2006 ZX-10R
1999 Kawasaki ZRX1100
hmmmmm i have wanted to do this but people have had problems seperating the lights and ruined them
2006 Red Triumph Daytona 675
i believe you can also work it apart with a heat gun. but you just have to be careful.
 Posting Permissions

 Reply With Quote